
Landing page checklist before sending paid traffic
Paid traffic turns small landing-page mistakes into expensive ones. Before launching an ad, test the complete visitor path: the message that earns the click, the mobile page, the form, the confirmation, the lead record, and the downstream automation.
A polished page can still fail because of a broken destination, an unclear mobile form, a missing confirmation, an inactive webhook, or campaign links without source tracking.
1. Check message match
- Offer and message match
- Desktop and mobile layout
- CTA and post-signup destination
- Real test submission
- UTM attribution and automation
- Policy, disclosure, and small traffic test
The first visible headline should continue the promise from the ad, email, or placement. If the ad promises a specific checklist, the landing page should name that checklist immediately rather than opening with a generic company description.
- The audience is recognizable.
- The promised outcome is specific.
- The offer on the page matches the creative and destination settings in the ad platform.
- Any price, deadline, or eligibility claim is consistent across the campaign.
2. Review the realistic mobile viewport
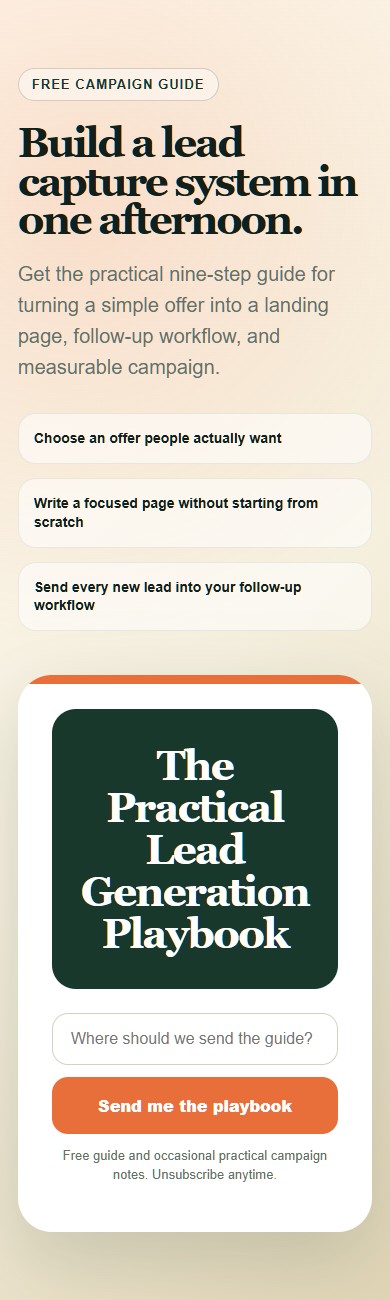
Use the QuickPages mobile preview in the visual editor. It uses a narrow viewport instead of shrinking the desktop layout, making wrapping, spacing, and form problems easier to see.
Confirm that the headline remains readable, the form does not require horizontal scrolling, the primary button is obvious, and images do not push the offer too far down the page.
3. Validate every destination
Click every important link in a fresh browser session. Check the form button, download, booking link, outbound offer, privacy link, and any secondary call to action.
Avoid placeholder destinations such as example.com, empty links, or a button that returns to the same page. Confirm that external destinations load securely and make sense after the promise on the landing page.
4. Choose the post-signup experience
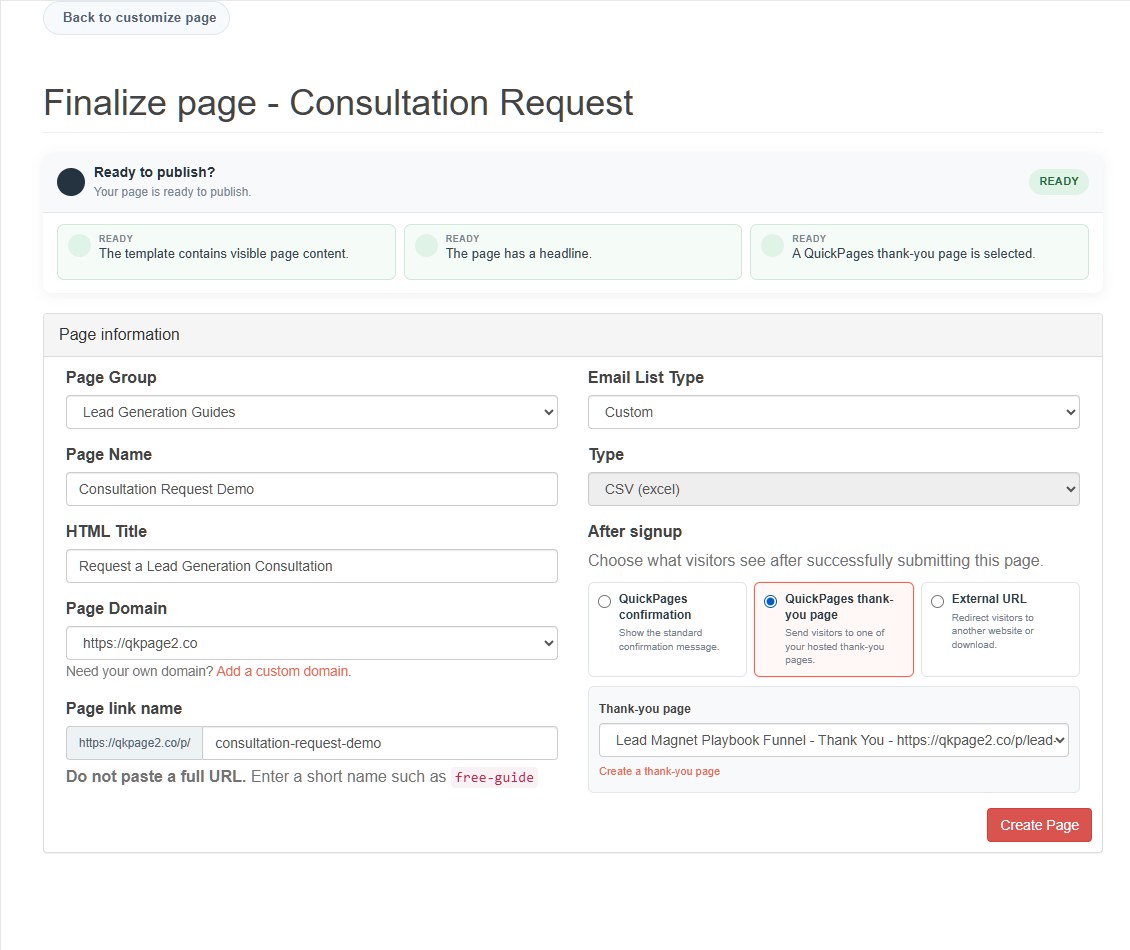
QuickPages can show its standard confirmation, open a published QuickPages thank-you page, or redirect to an external URL. Select the option deliberately and test it after a real form submission.
If the visitor expects a download, either provide it on the thank-you page or explain clearly that it will arrive by email. Do not leave the visitor wondering whether the form worked.
5. Review the publishing checks
The final page settings evaluate visible content, the headline, confirmation path, placeholder copy, and suspicious or incomplete configuration. Blocking errors identify settings that cannot produce a valid page. Quality warnings identify issues worth reviewing without preventing publication.
6. Submit the form yourself
Use a test address you control and complete every field. Verify that:
- The browser accepts and submits the form once.
- The expected confirmation or redirect appears.
- The lead is visible in QuickPages with the correct page and fields.
- The timestamp and source information are reasonable.
- Any Zapier or webhook action receives the live conversion.
- The follow-up email or CRM record uses the mapped values correctly.
7. Add campaign attribution
Add a consistent set of UTM parameters to the URL used in the ad platform. At minimum, identify the source, medium, and campaign. Use utm_content when you need to distinguish creatives or placements.
https://qkpage2.co/p/consultation-request
?utm_source=linkedin
&utm_medium=paid_social
&utm_campaign=consultation_launch
&utm_content=founder_video
Submit one test lead through the tagged link and confirm the source appears in the lead inbox before launching. The UTM tracking guide explains the naming and reporting workflow.
8. Check policy and trust details
Use accurate claims, real proof, and clear disclosure. Do not use fake scarcity, unsupported income or health claims, or testimonials that imply results you cannot substantiate. Ask only for information you need and explain sensitive requests in context.
Review the advertising platform's current landing-page and destination requirements before launch. Platform policies change, and passing QuickPages publishing checks does not guarantee approval from an ad network.
9. Start with a controlled traffic test
Send a small amount of traffic first. Confirm that views and submissions appear, leads are useful, and downstream steps work before increasing spend.
Do not redesign the page after a handful of visits. Fix technical failures immediately, but wait for enough traffic before treating normal conversion variation as a design problem.
Final launch check
- Message matches the traffic source.
- Desktop and mobile layouts are usable.
- Every destination works.
- The confirmation path delivers the promise.
- A live test lead reaches QuickPages and any automation.
- UTM attribution appears correctly.
- Claims and disclosures are accurate.