
How to build a two-step lead magnet funnel
A lead magnet funnel connects the page that earns the signup to the page that delivers the promise. Building the two steps together makes the visitor experience clearer and gives you one report for the campaign flow without merging the pages' individual histories.
1. Define the promise and next action
Before choosing templates, decide what the visitor receives and what should happen immediately afterward. A useful funnel has one primary promise and one next action.
- Opt-in promise: "Get the lead generation playbook."
- Immediate confirmation: confirm that the request worked.
- Delivery: provide the download or explain where it will arrive.
- Next action: invite one relevant step, such as reading the guide, booking a call, or viewing an offer.
2. Create the funnel as one campaign
Click Create Funnel from the sidebar or dashboard. Choose the funnel type, internal name, HTML title, page group, publishing domain, and base link name. QuickPages creates a related thank-you link by adding -thanks.
Select the entry template visitors see first and a thank-you template for the second step. Preview both layouts before creating the funnel.
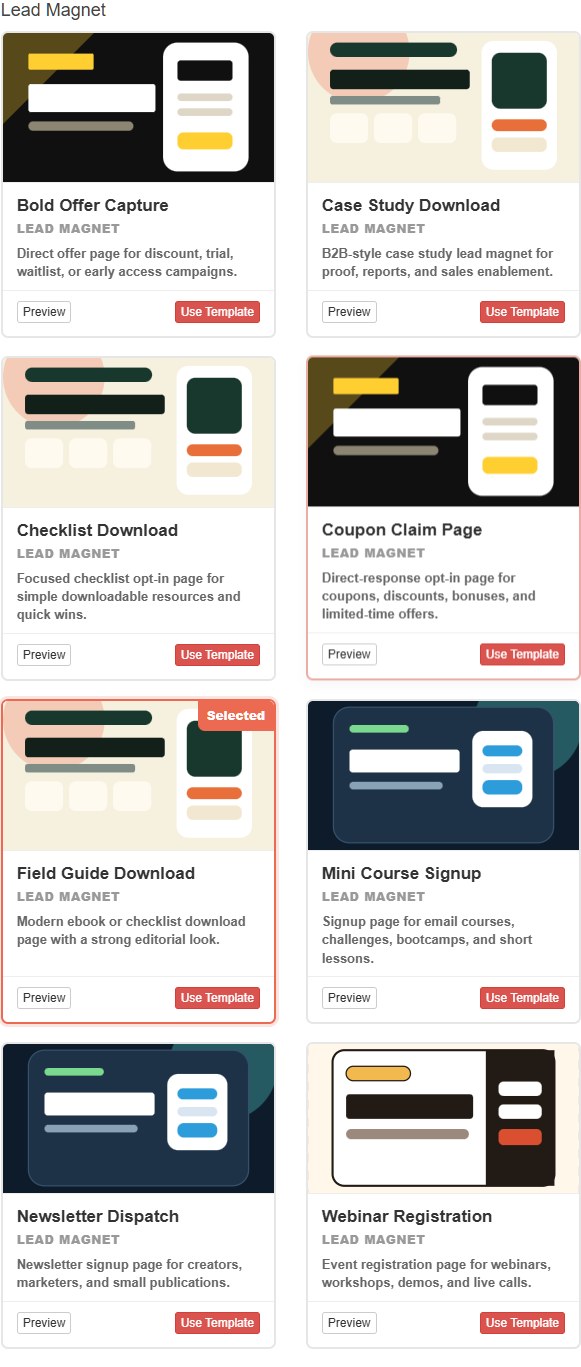
3. Edit the opt-in page around one outcome
Open the opt-in page design and replace the template content with a specific promise. Use the visual editor to select text directly, edit form labels, upload the resource cover, and review the mobile viewport.
A simple downloadable resource usually needs an email address and, at most, a first name. Longer forms are appropriate only when the answers affect qualification or follow-up.
4. Make the thank-you page useful
The thank-you page should do more than say "success." It should tell the visitor exactly what happened and make the promised next step obvious.
- Repeat the resource name so the visitor knows the correct request was received.
- Provide the download button when the file can be delivered immediately.
- Explain whether a confirmation email is also coming.
- Offer one secondary action only when it follows naturally from the resource.
Edit the thank-you page separately from the opt-in page. Its own URL, design, views, and actions remain available even though the funnel report connects the two steps.
| Use a standalone page with a selected thank-you page when | Use a managed funnel when |
|---|---|
| You already have a published thank-you page to reuse. | You want QuickPages to create and connect both steps together. |
| The relationship is simple and the pages are managed independently. | You want a dedicated funnel report and visible campaign relationship. |
| You may send several pages to the same confirmation. | The opt-in and delivery pages belong to one repeatable campaign. |
5. Choose how leads are handled
Use Custom to store submissions in the QuickPages lead inbox and export them as CSV. This is a good default while validating a new resource.
When immediate automation matters, connect a premium conversion webhook to Zapier or another compatible endpoint. QuickPages saves the lead locally before queuing the external delivery. The Zapier guide covers that workflow.
6. Test both steps as a visitor
Publish the funnel, open the opt-in URL, and submit an address you control. Confirm that the hosted thank-you page opens, its download or next-step link works, and the lead appears in the inbox.
Repeat the test in a mobile viewport. Pay particular attention to the form, primary button, resource cover, and the first screen of the thank-you page.
7. Read the funnel report in order
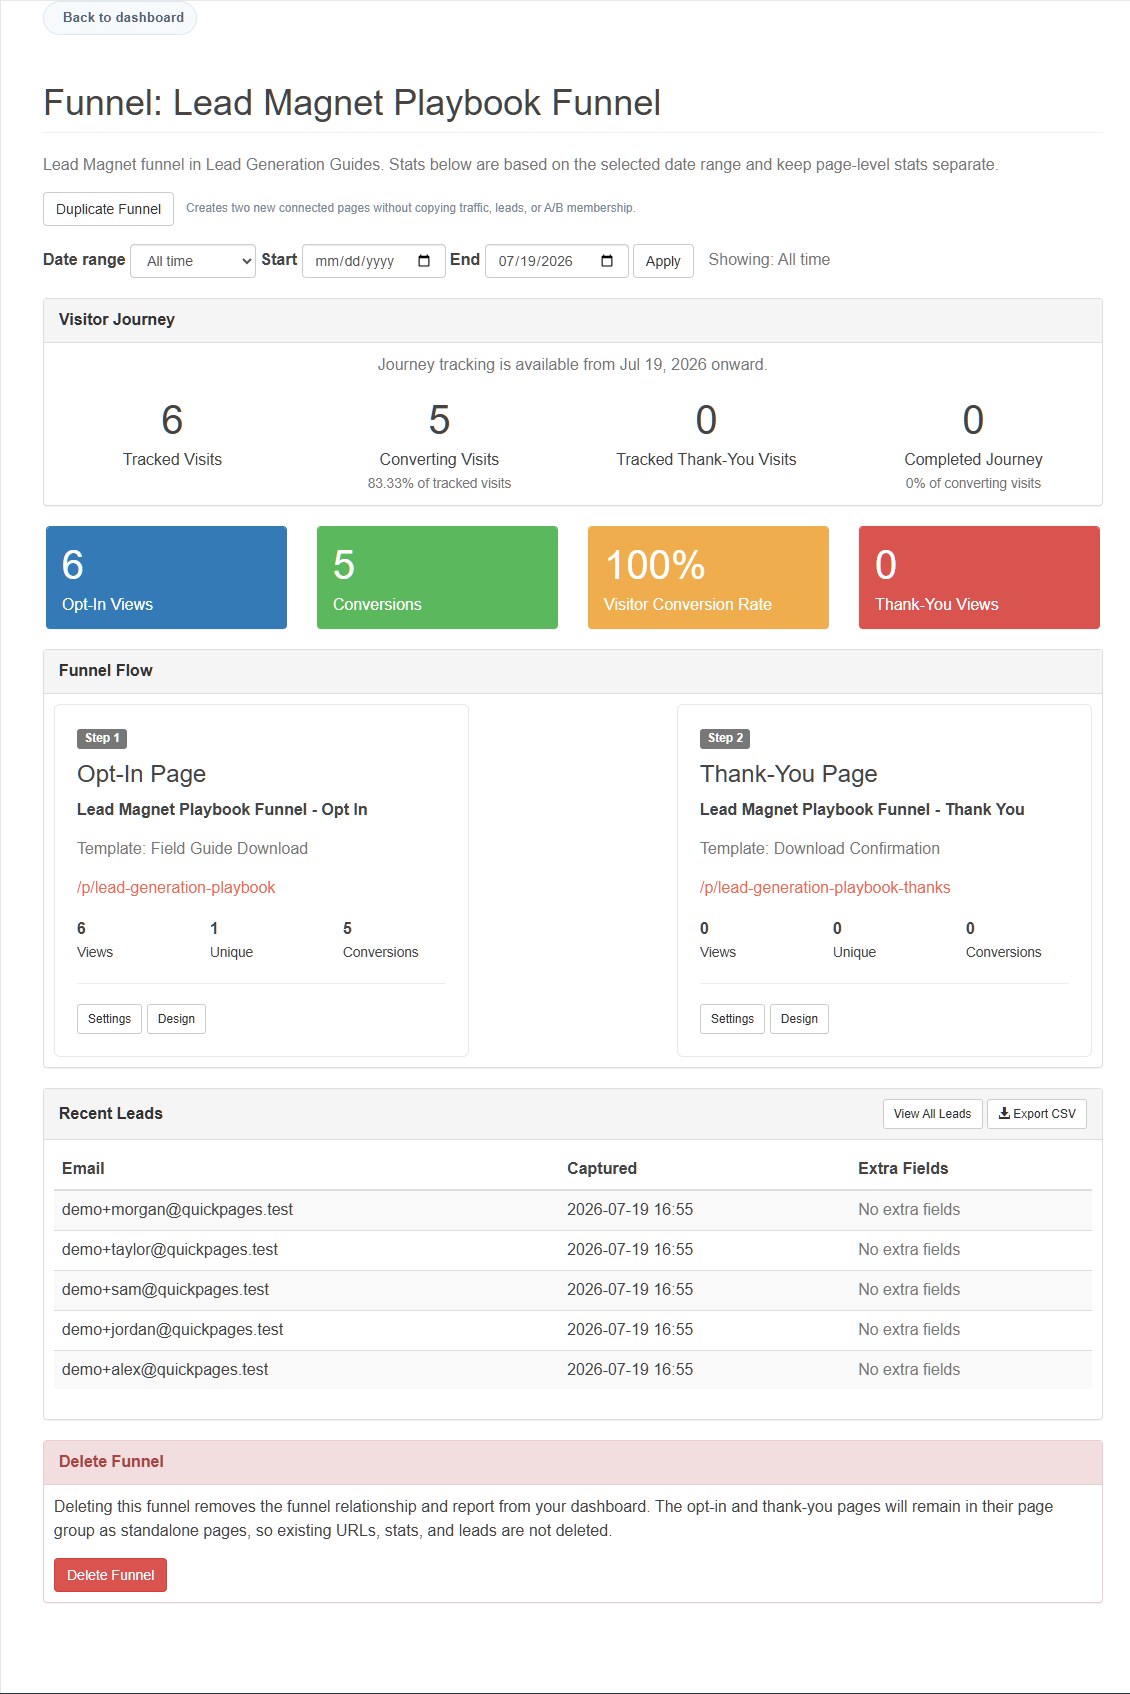
The funnel report shows tracked journeys, entry-page views, estimated visitors, submissions, visitor conversion rate, thank-you views, and the connected page flow. It also lists recent leads and provides the campaign export.
Each page continues to maintain its own statistics. This matters when a page existed before the funnel, receives direct traffic, or is later reused elsewhere.
8. Diagnose the weak step
- Few opt-ins: improve the offer, message match, trust, or form length.
- Opt-ins but few thank-you visits: test the form and redirect path for technical problems.
- Thank-you visits but few next actions: clarify the delivery button or remove competing choices.
- Many leads but low quality: tighten the audience promise or add one useful qualifying field.
9. Duplicate proven funnels
When a campaign structure works, use Duplicate Funnel to create two new connected pages without copying traffic, leads, or A/B test membership. Update both pages and their URLs before sending traffic.
If you delete the funnel relationship later, QuickPages tells you that the pages will remain as standalone pages. Existing URLs, page statistics, and leads are preserved.
After the first real conversions, use the follow-up sequence guide to extend the experience beyond the thank-you page.
Connect the promise to the delivery
Create the opt-in and thank-you steps together, test the complete path, and use the funnel report to improve the part that actually needs work.
Build a funnel in QuickPages